
What we did:
- Removed all interior panels and cotton insulation.
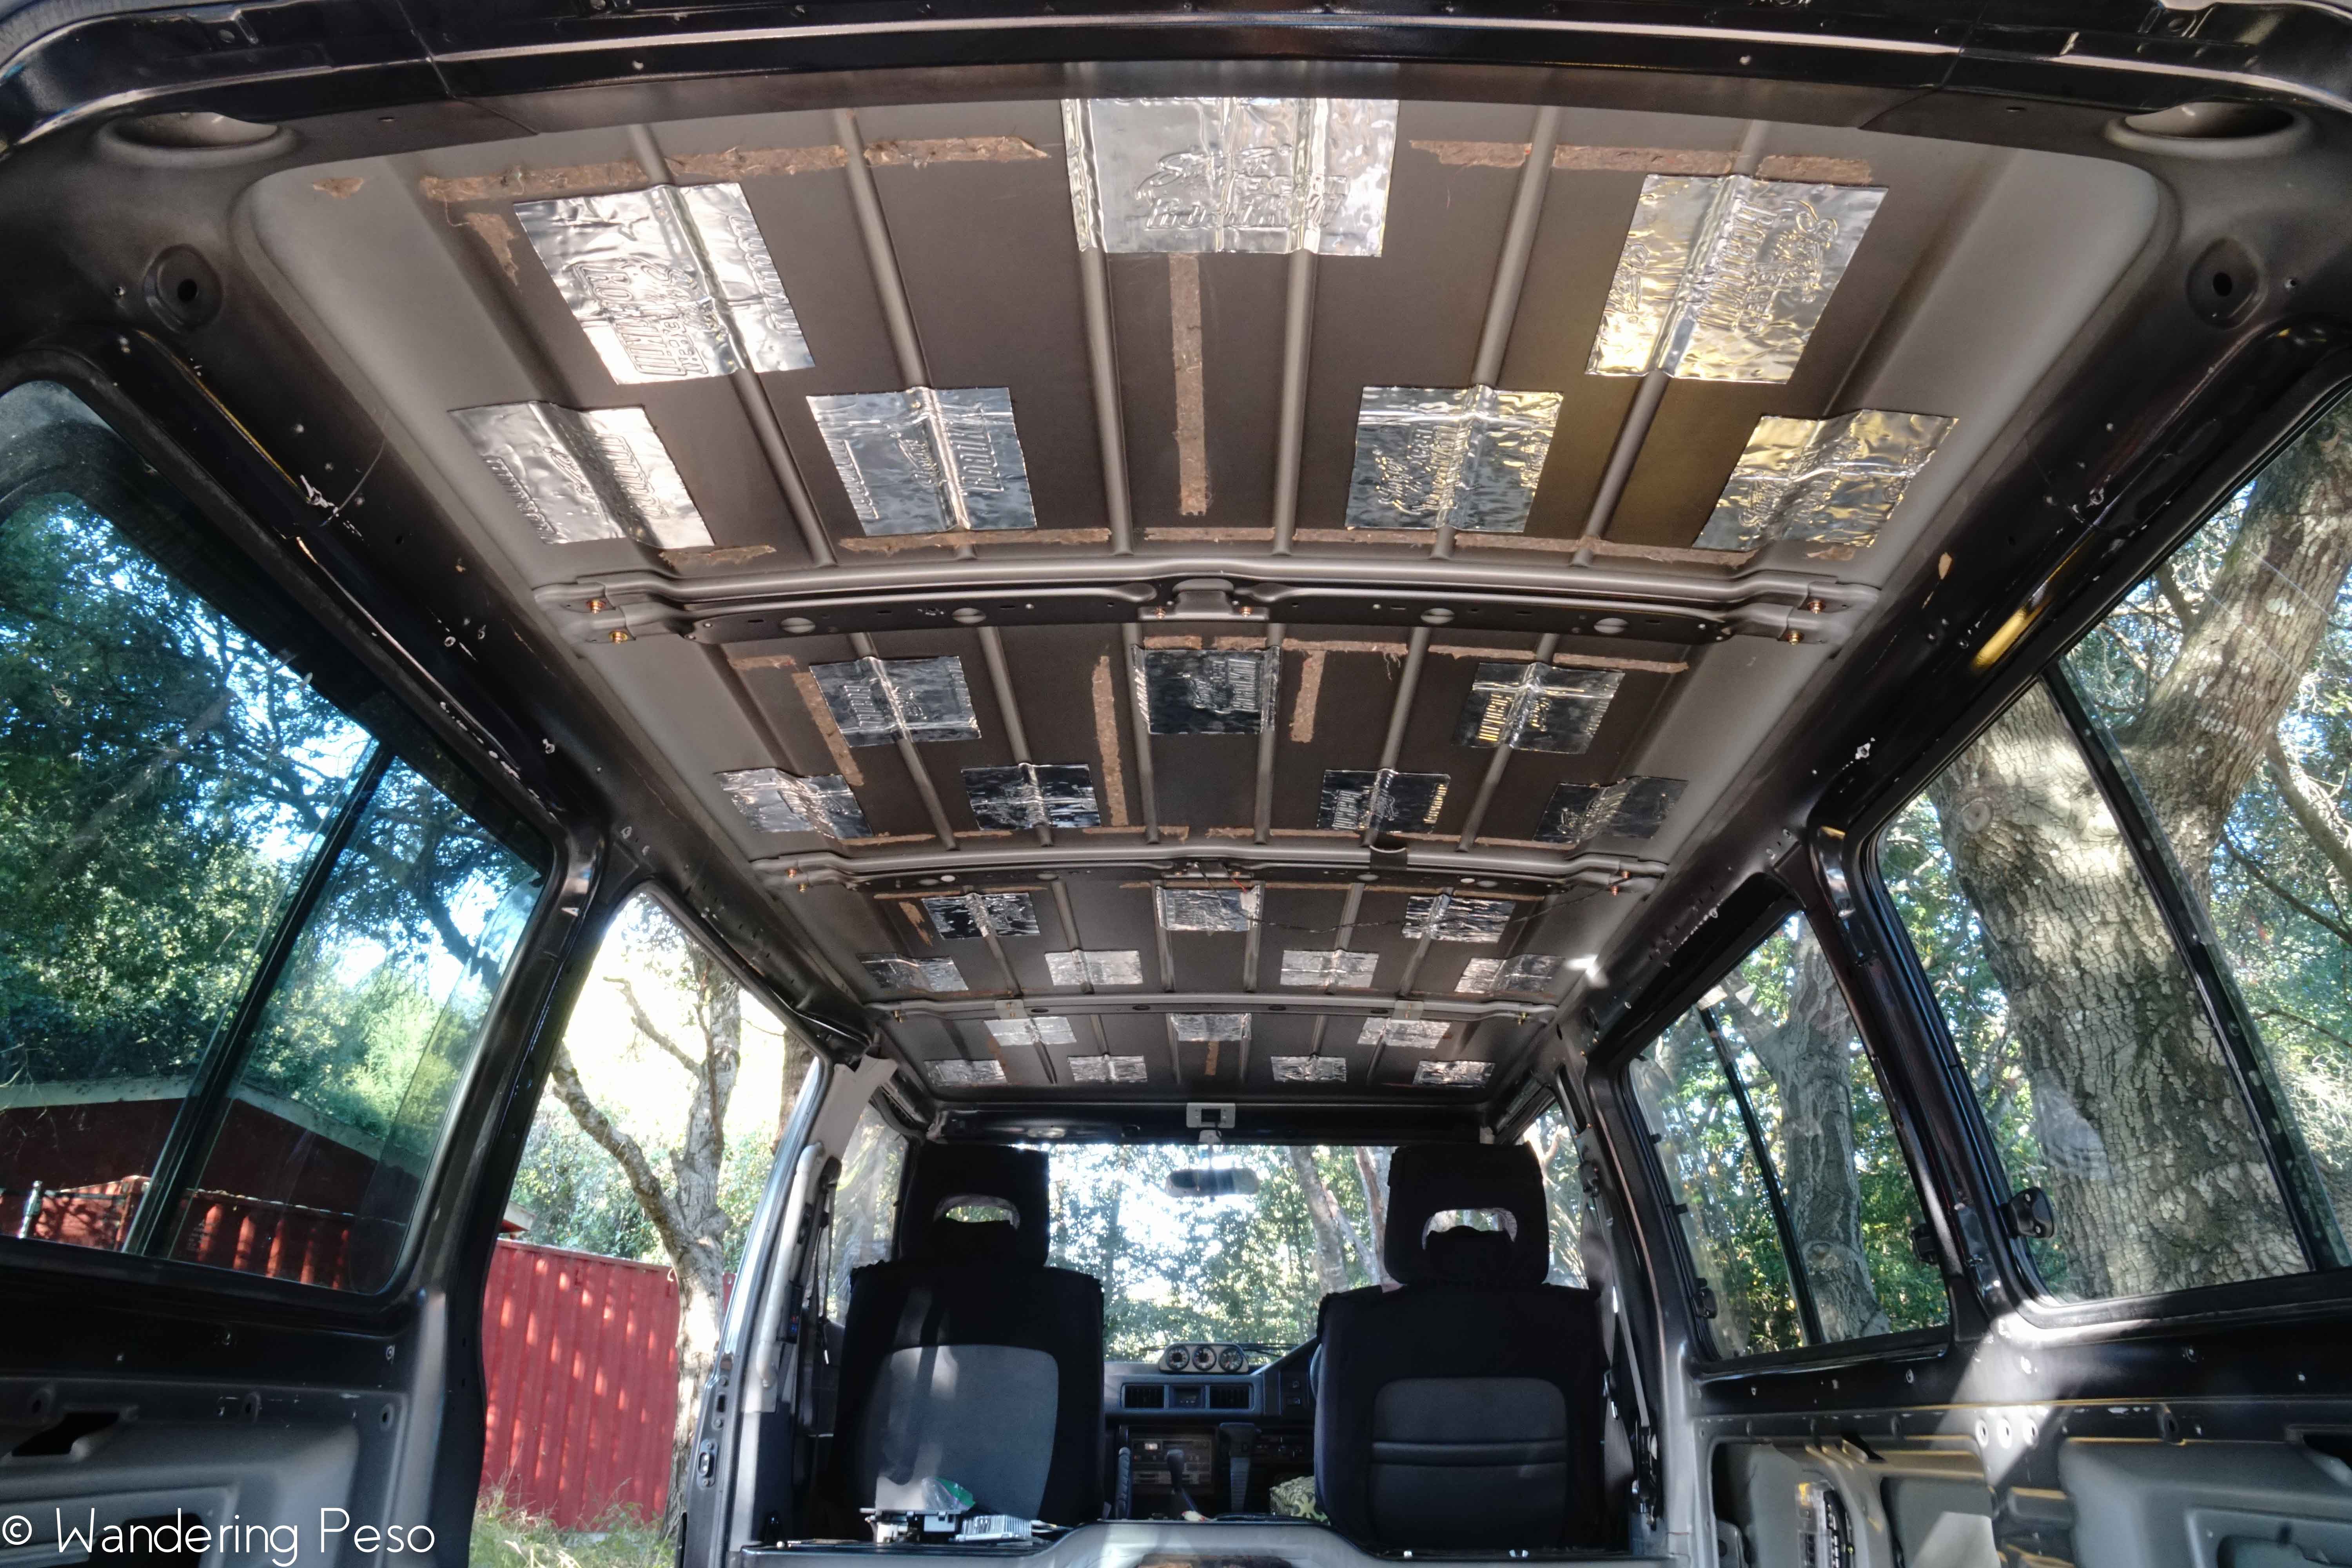
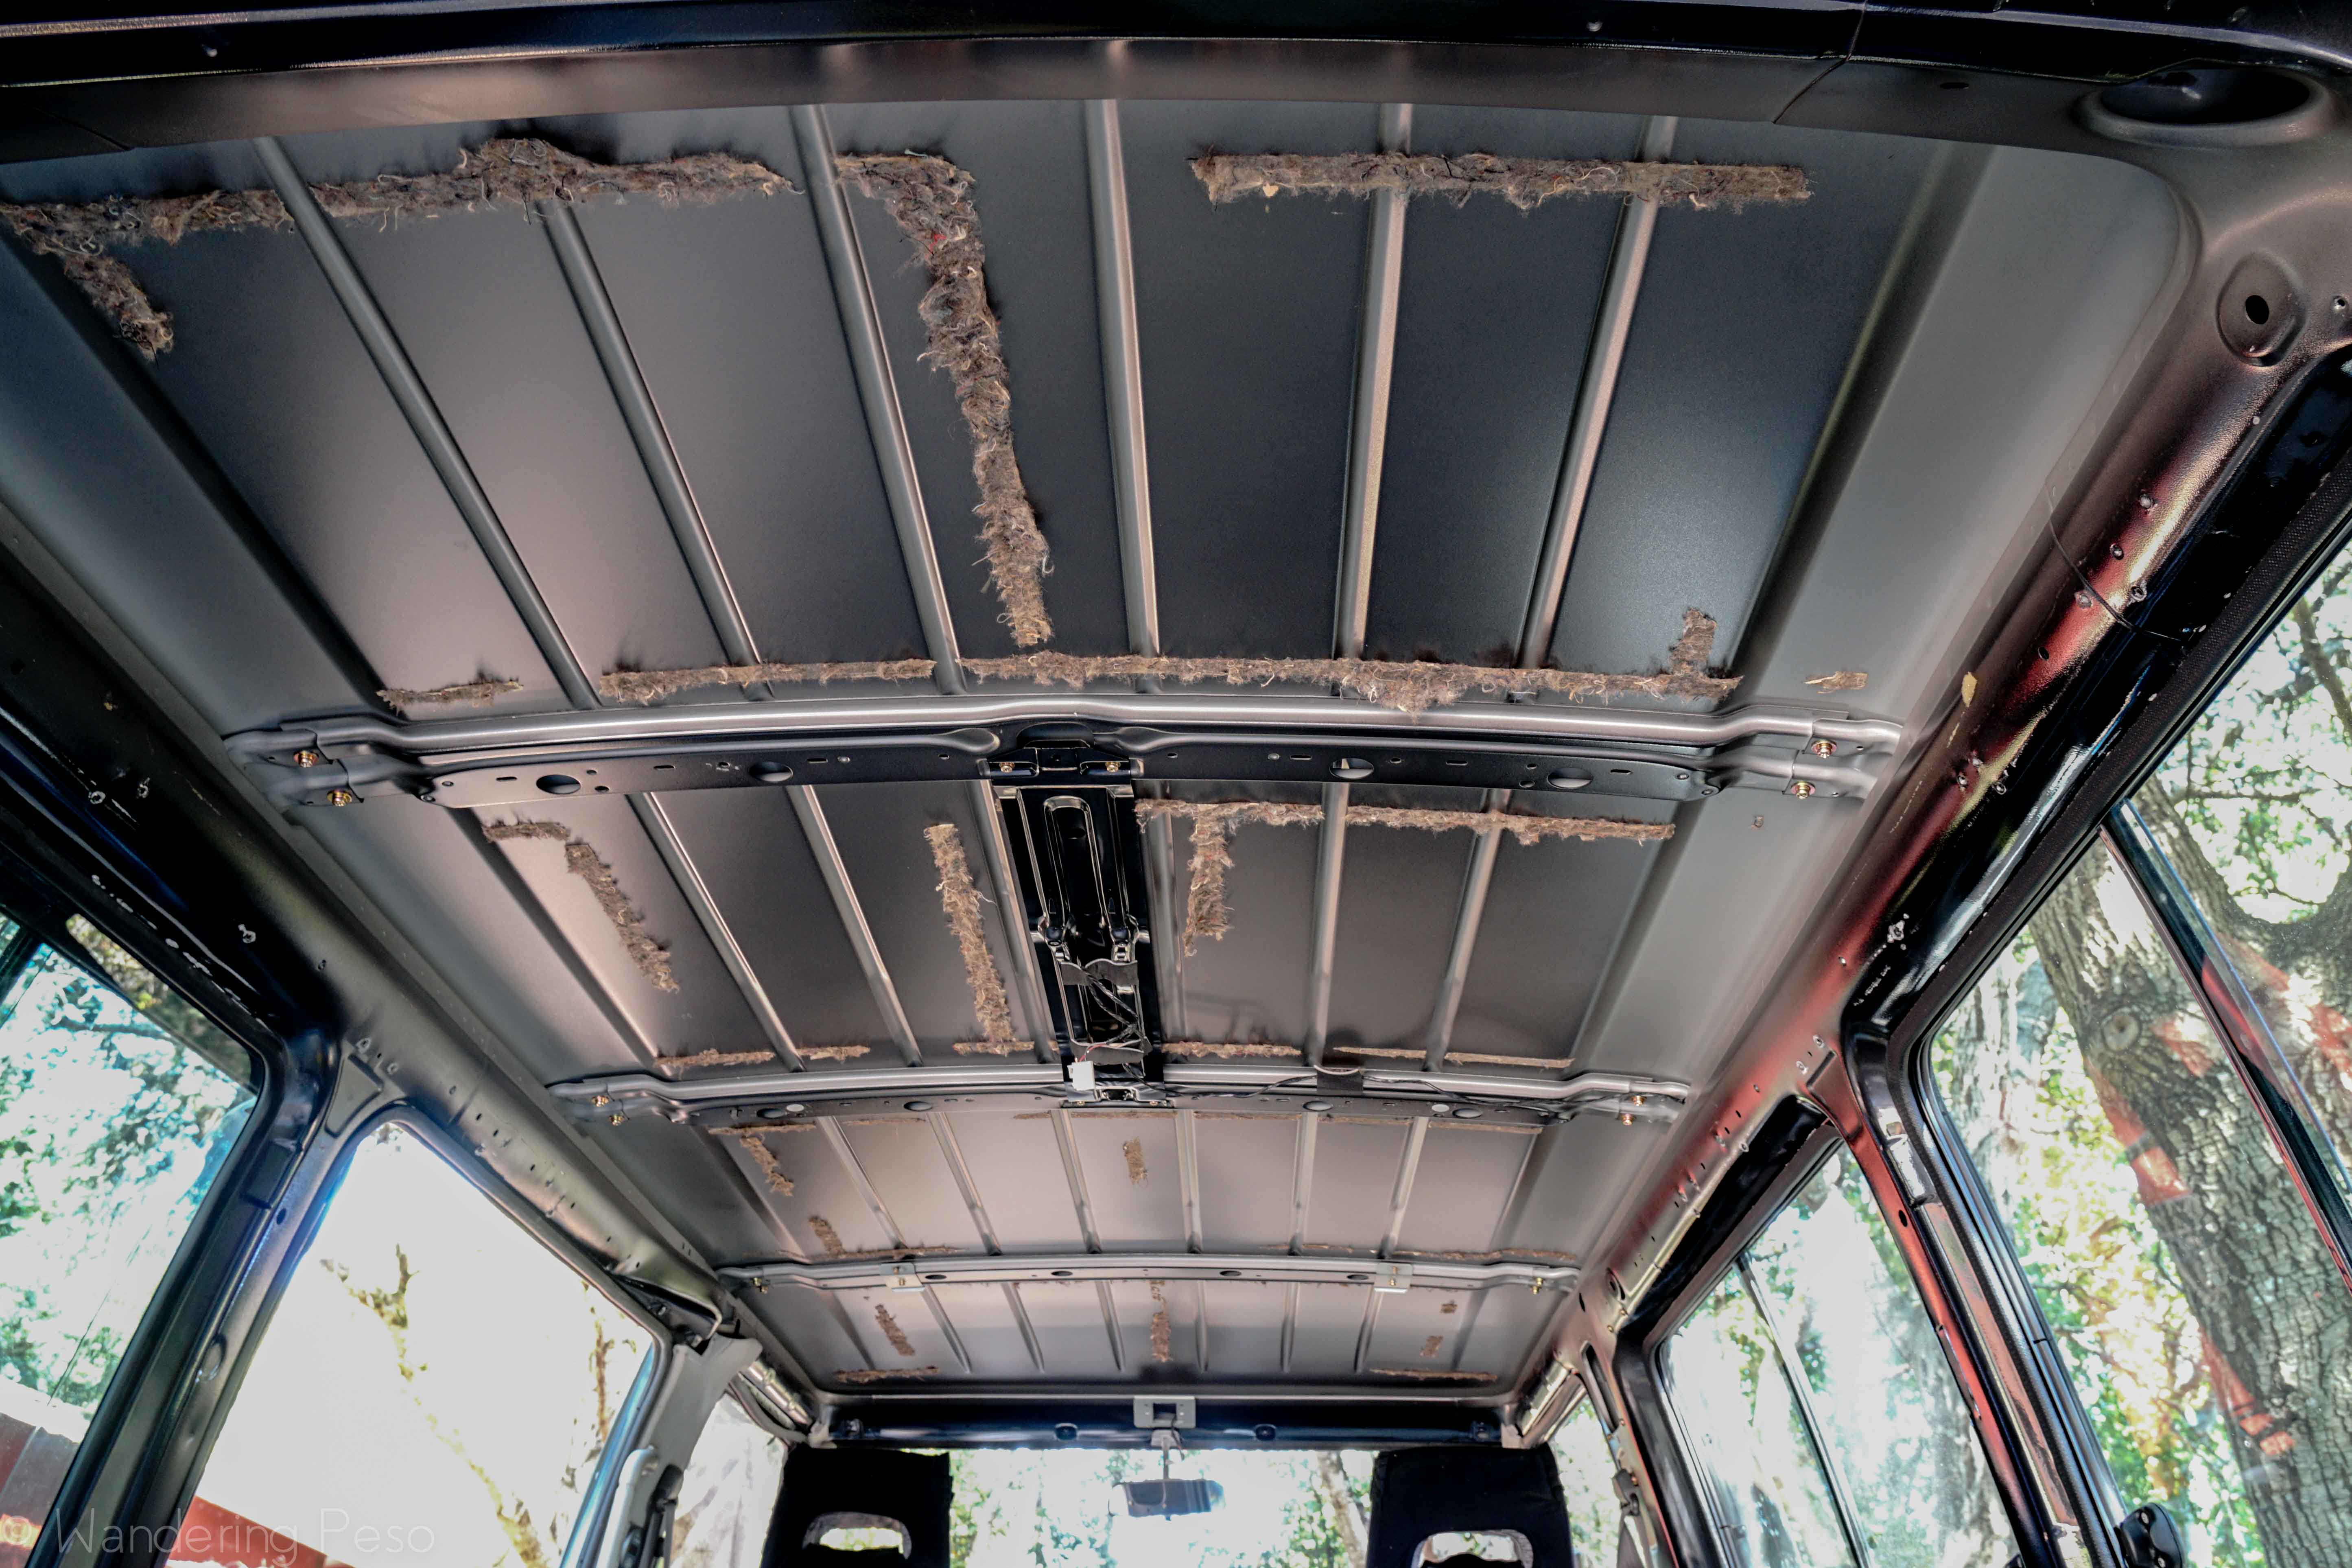
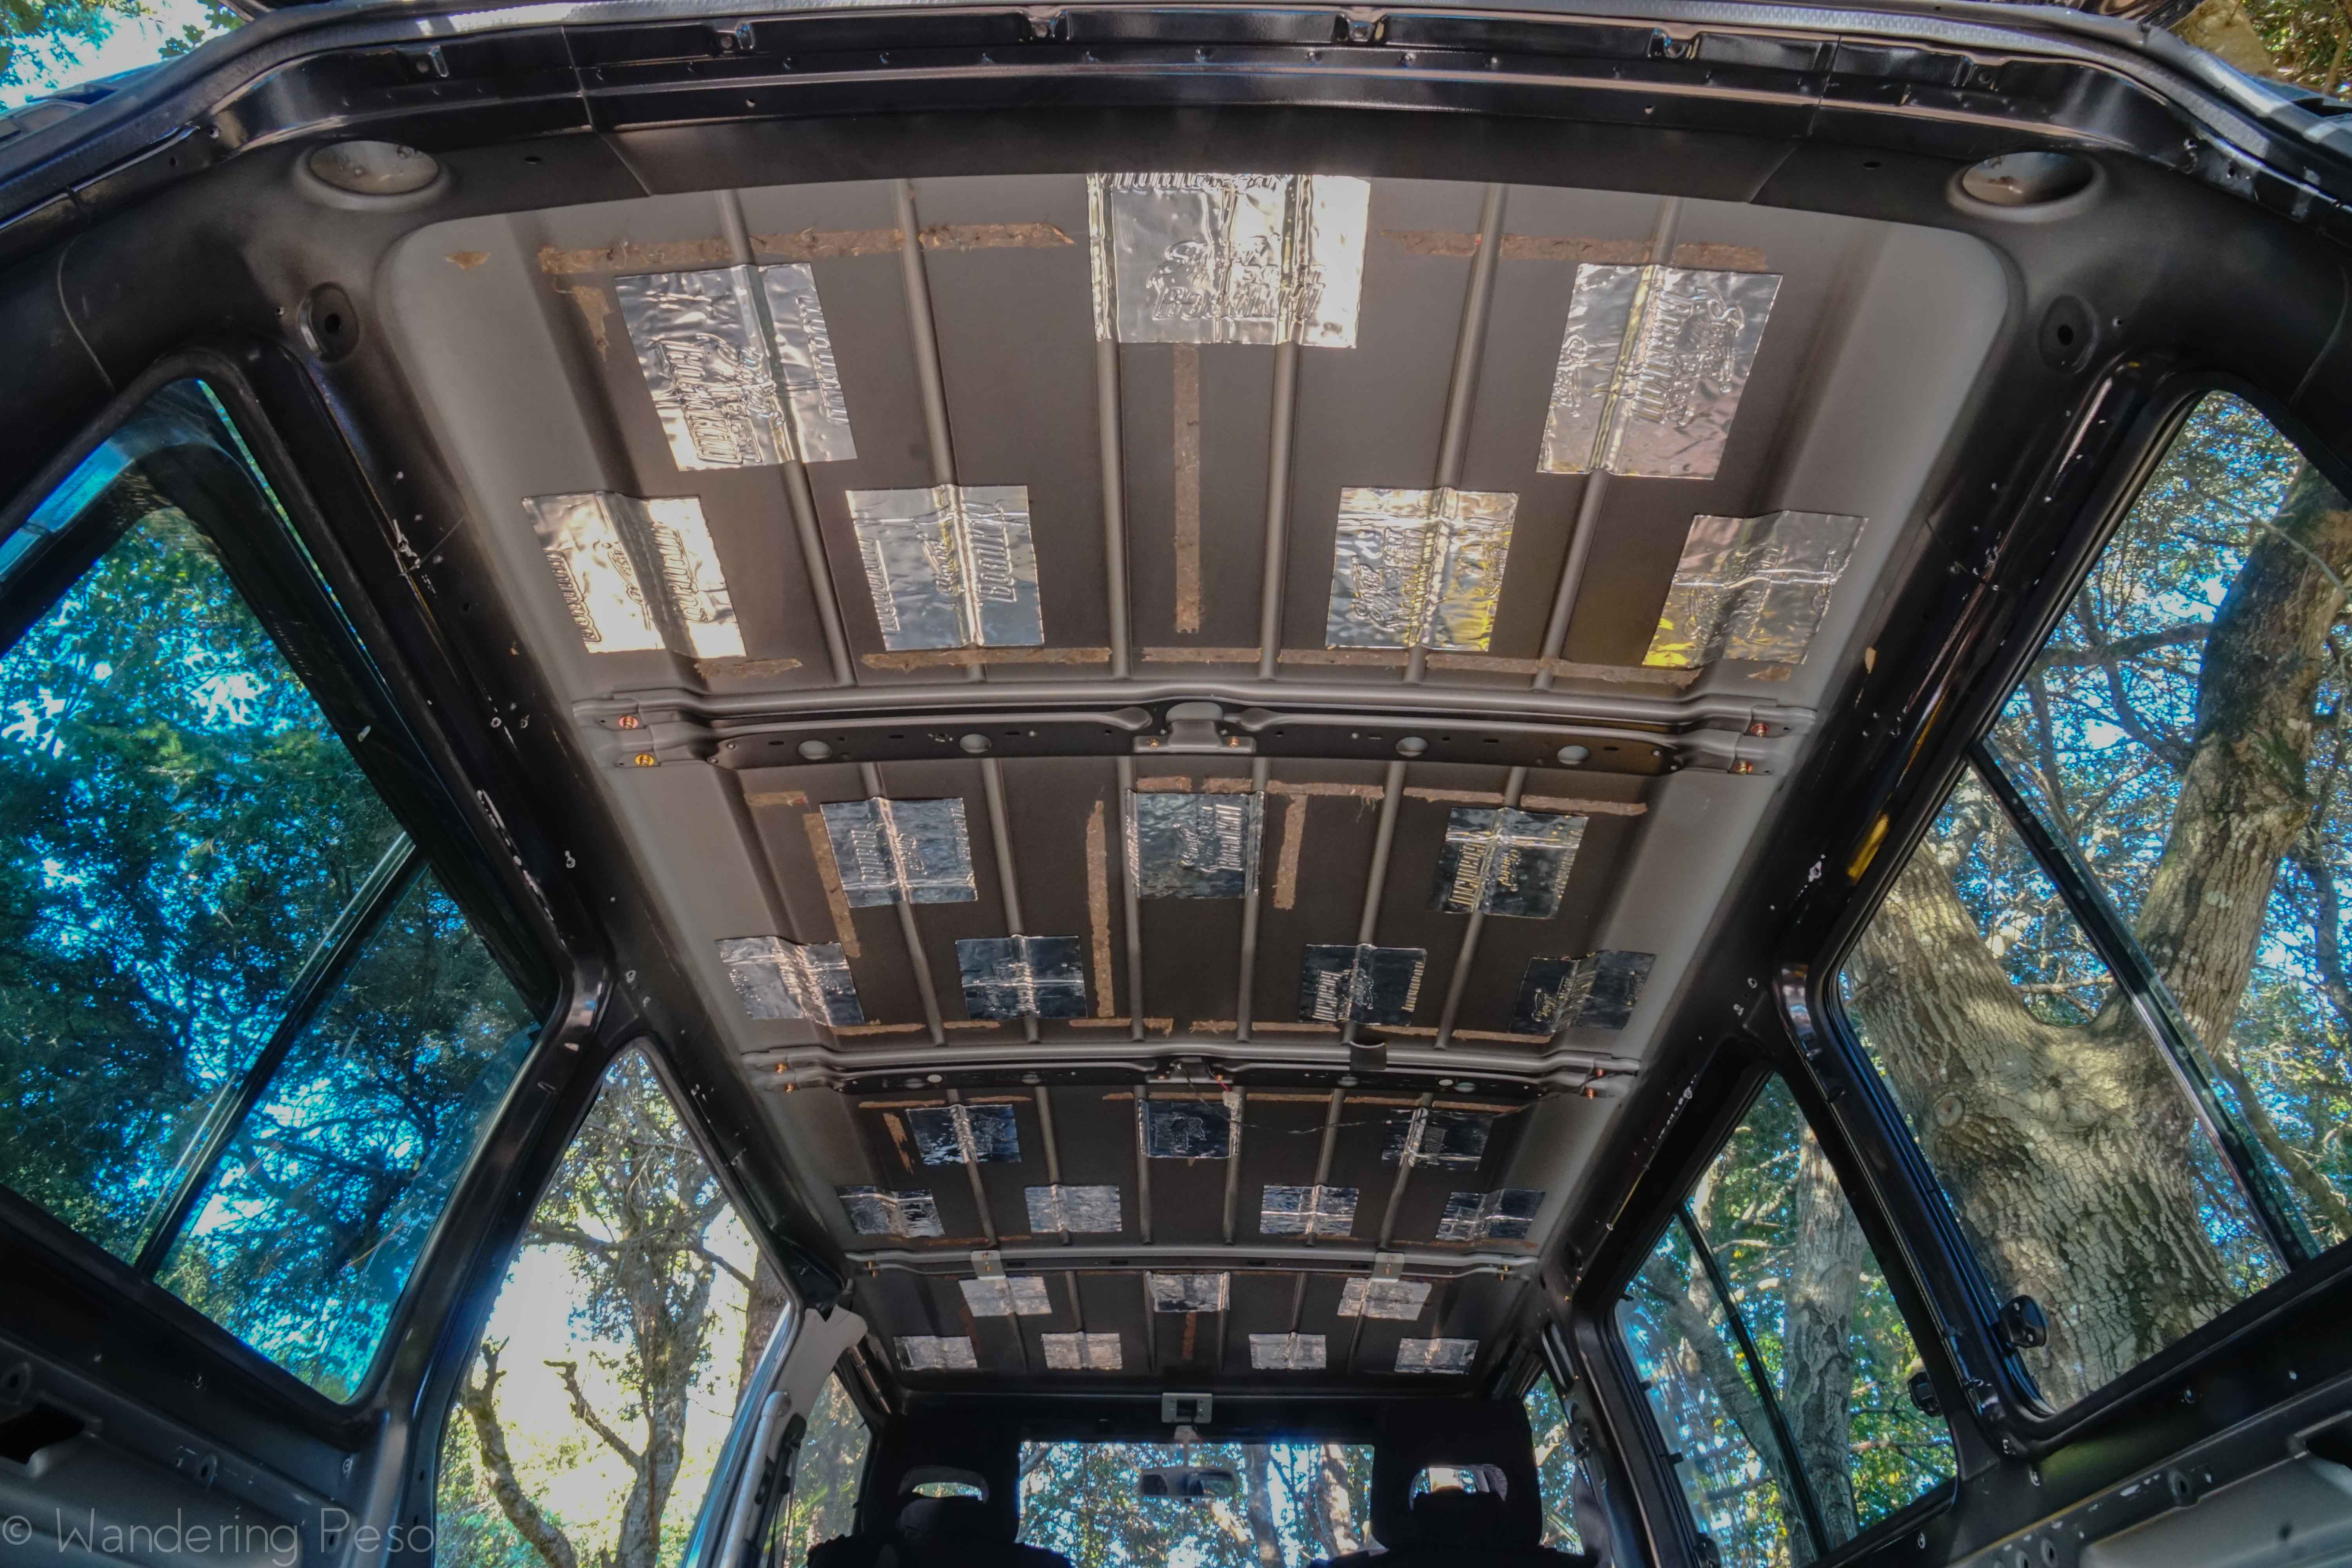
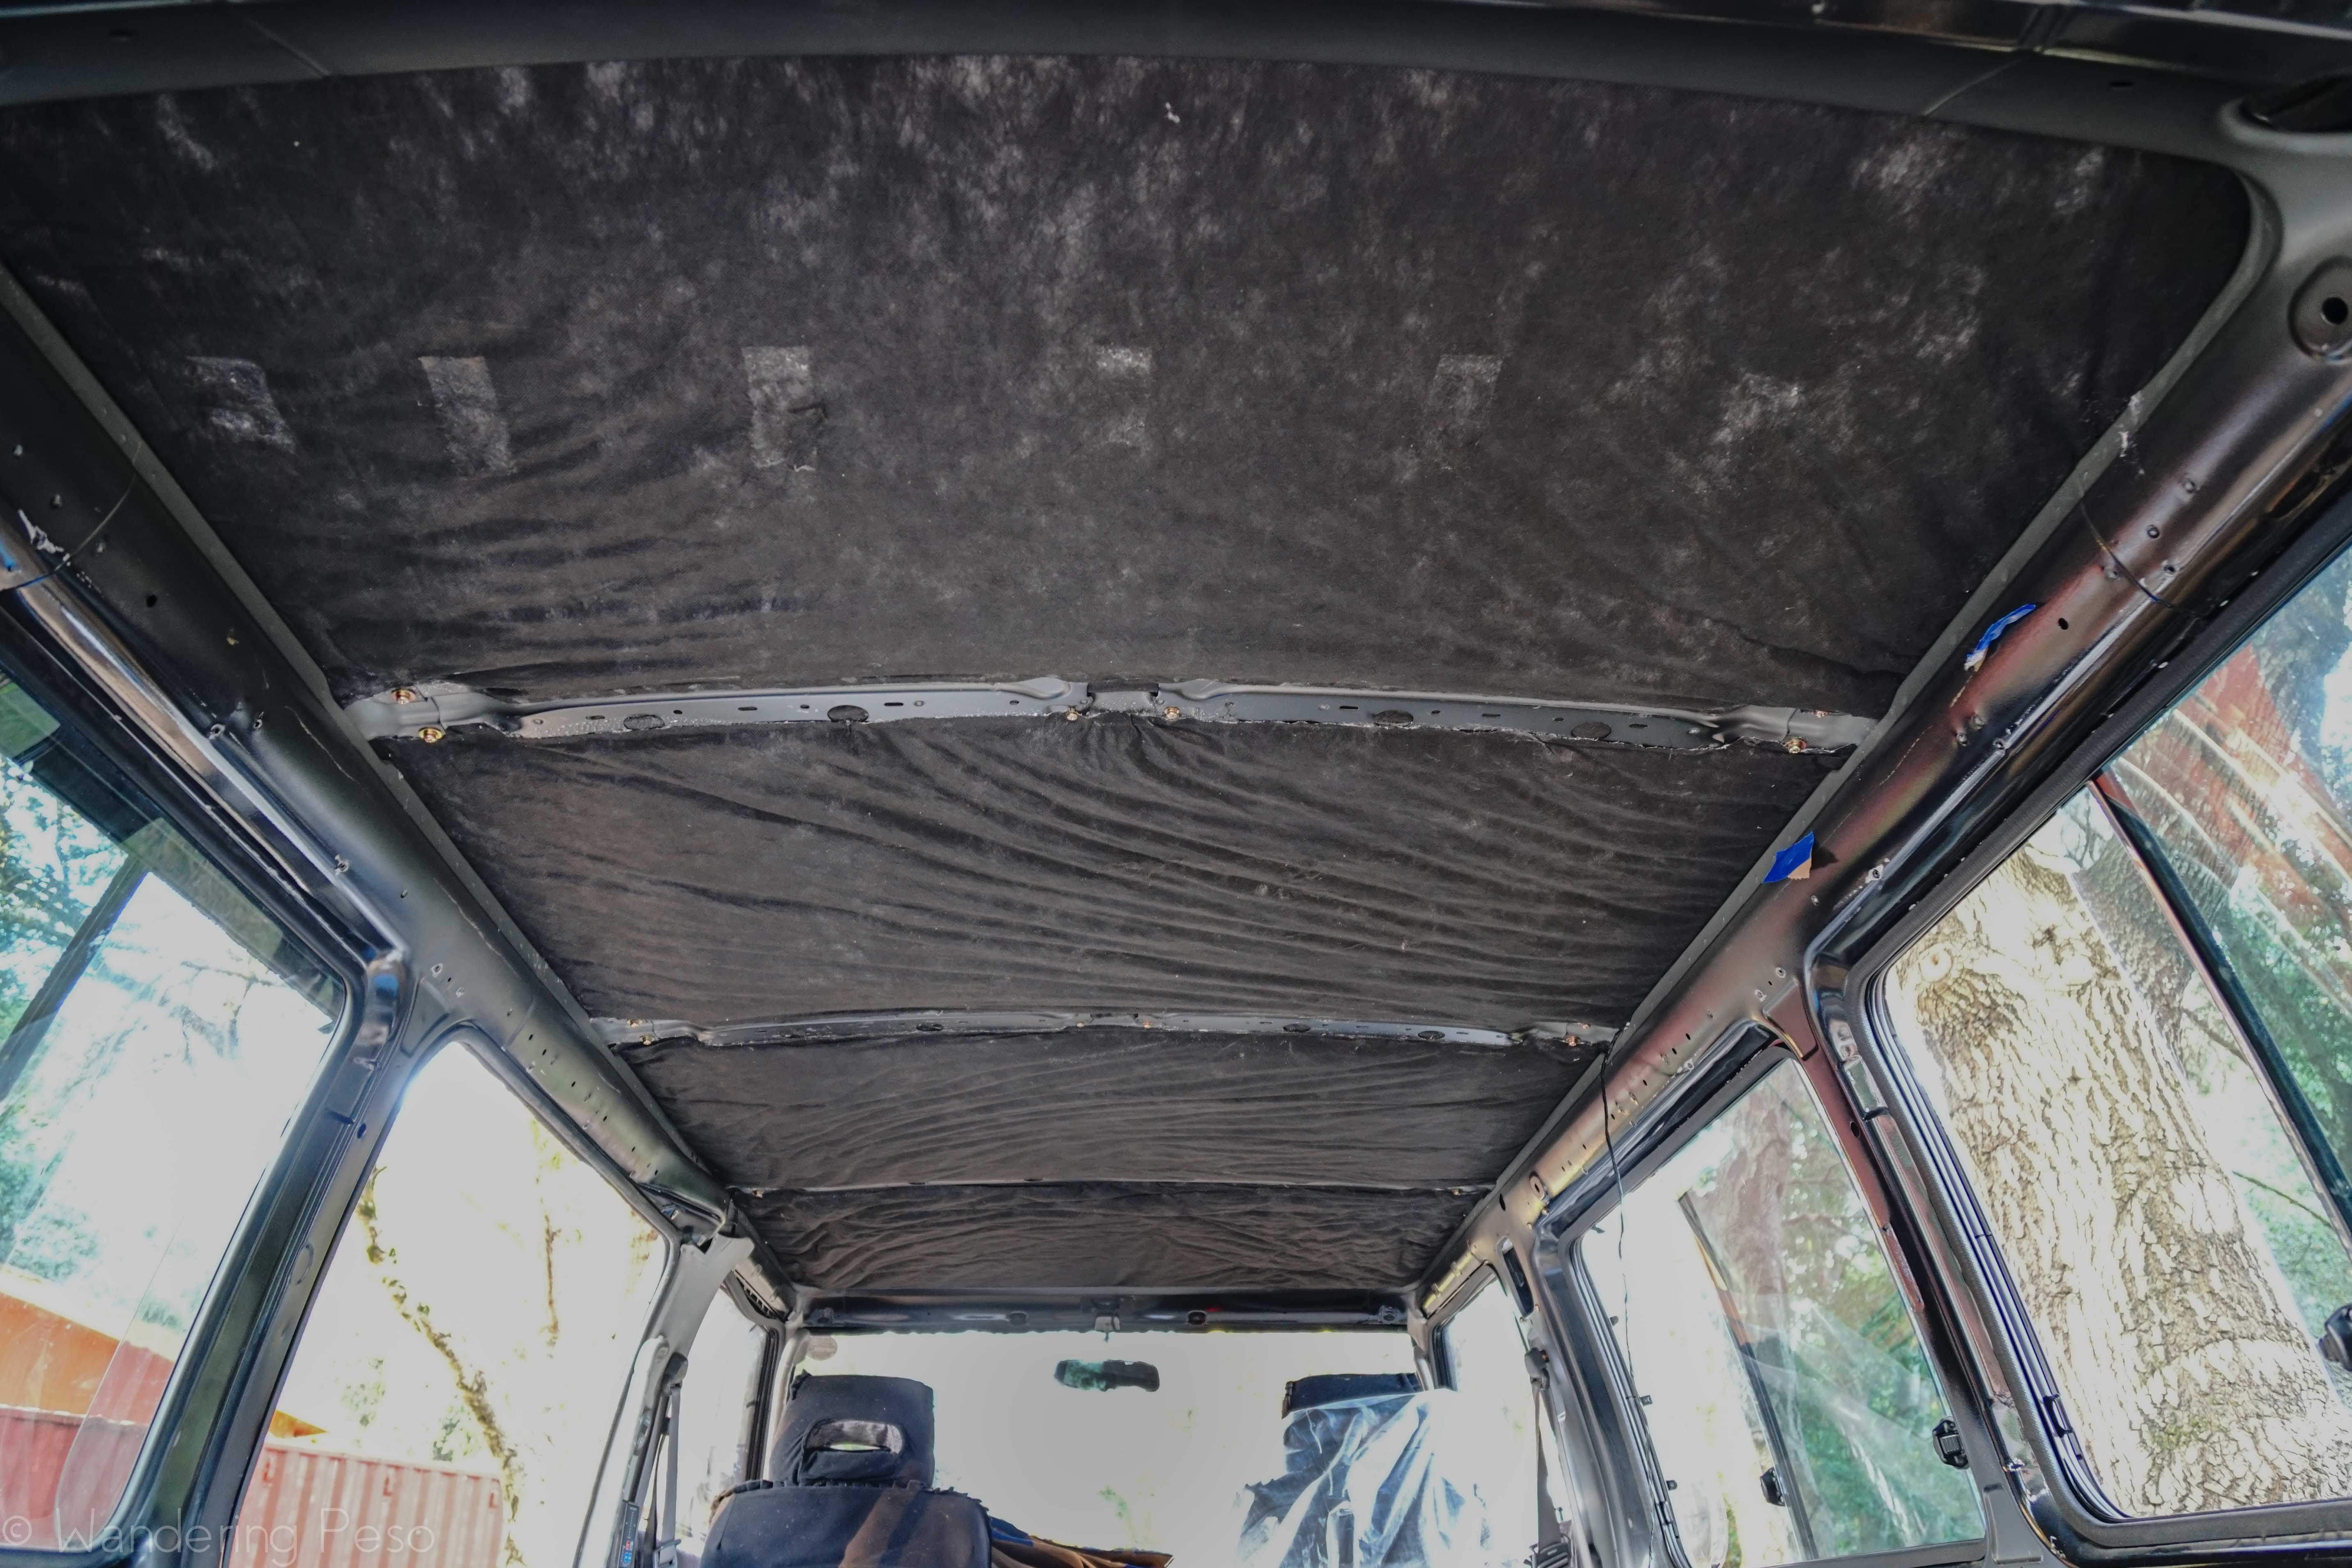
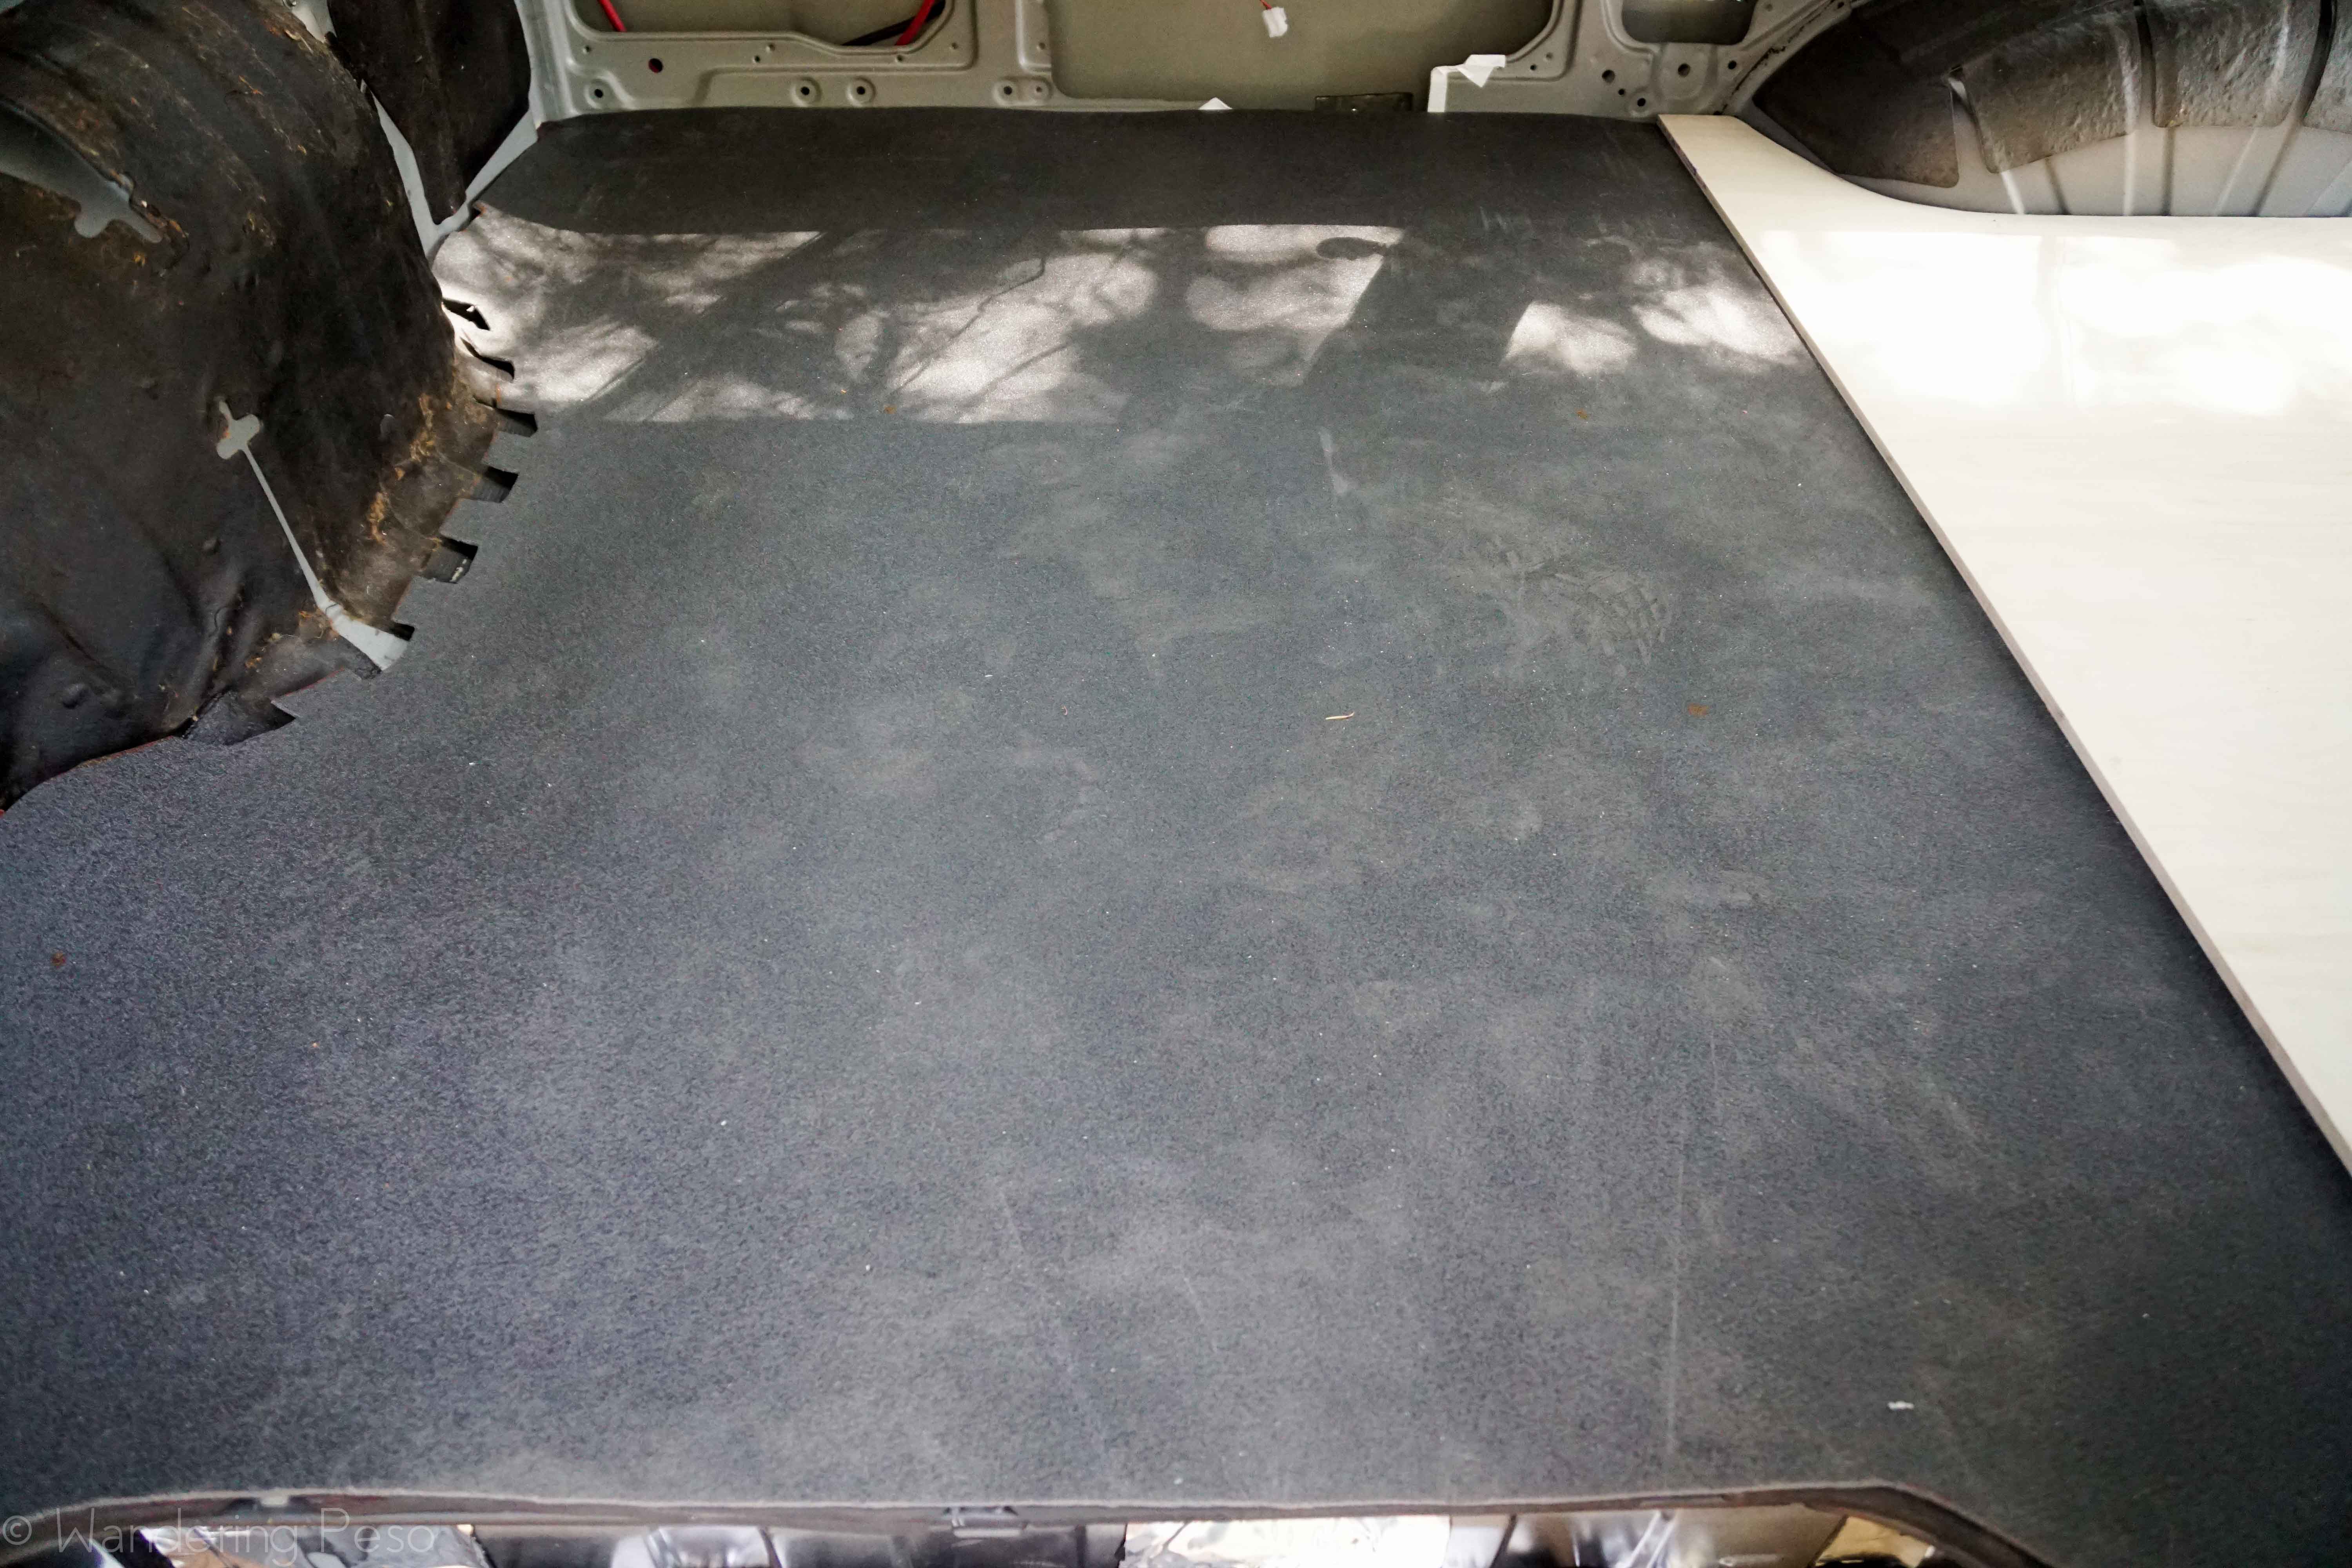
- Ceiling: 25% coverage of CLD tiles, 100% coverage with Thinsulate SM600 adhered with 3M90 adhesive spray.
- Side walls: 25% coverage with CLD tiles (Stinger Brand), 100% coverage with Thinsulate SM600 adhered with 3M90 adhesive spray.
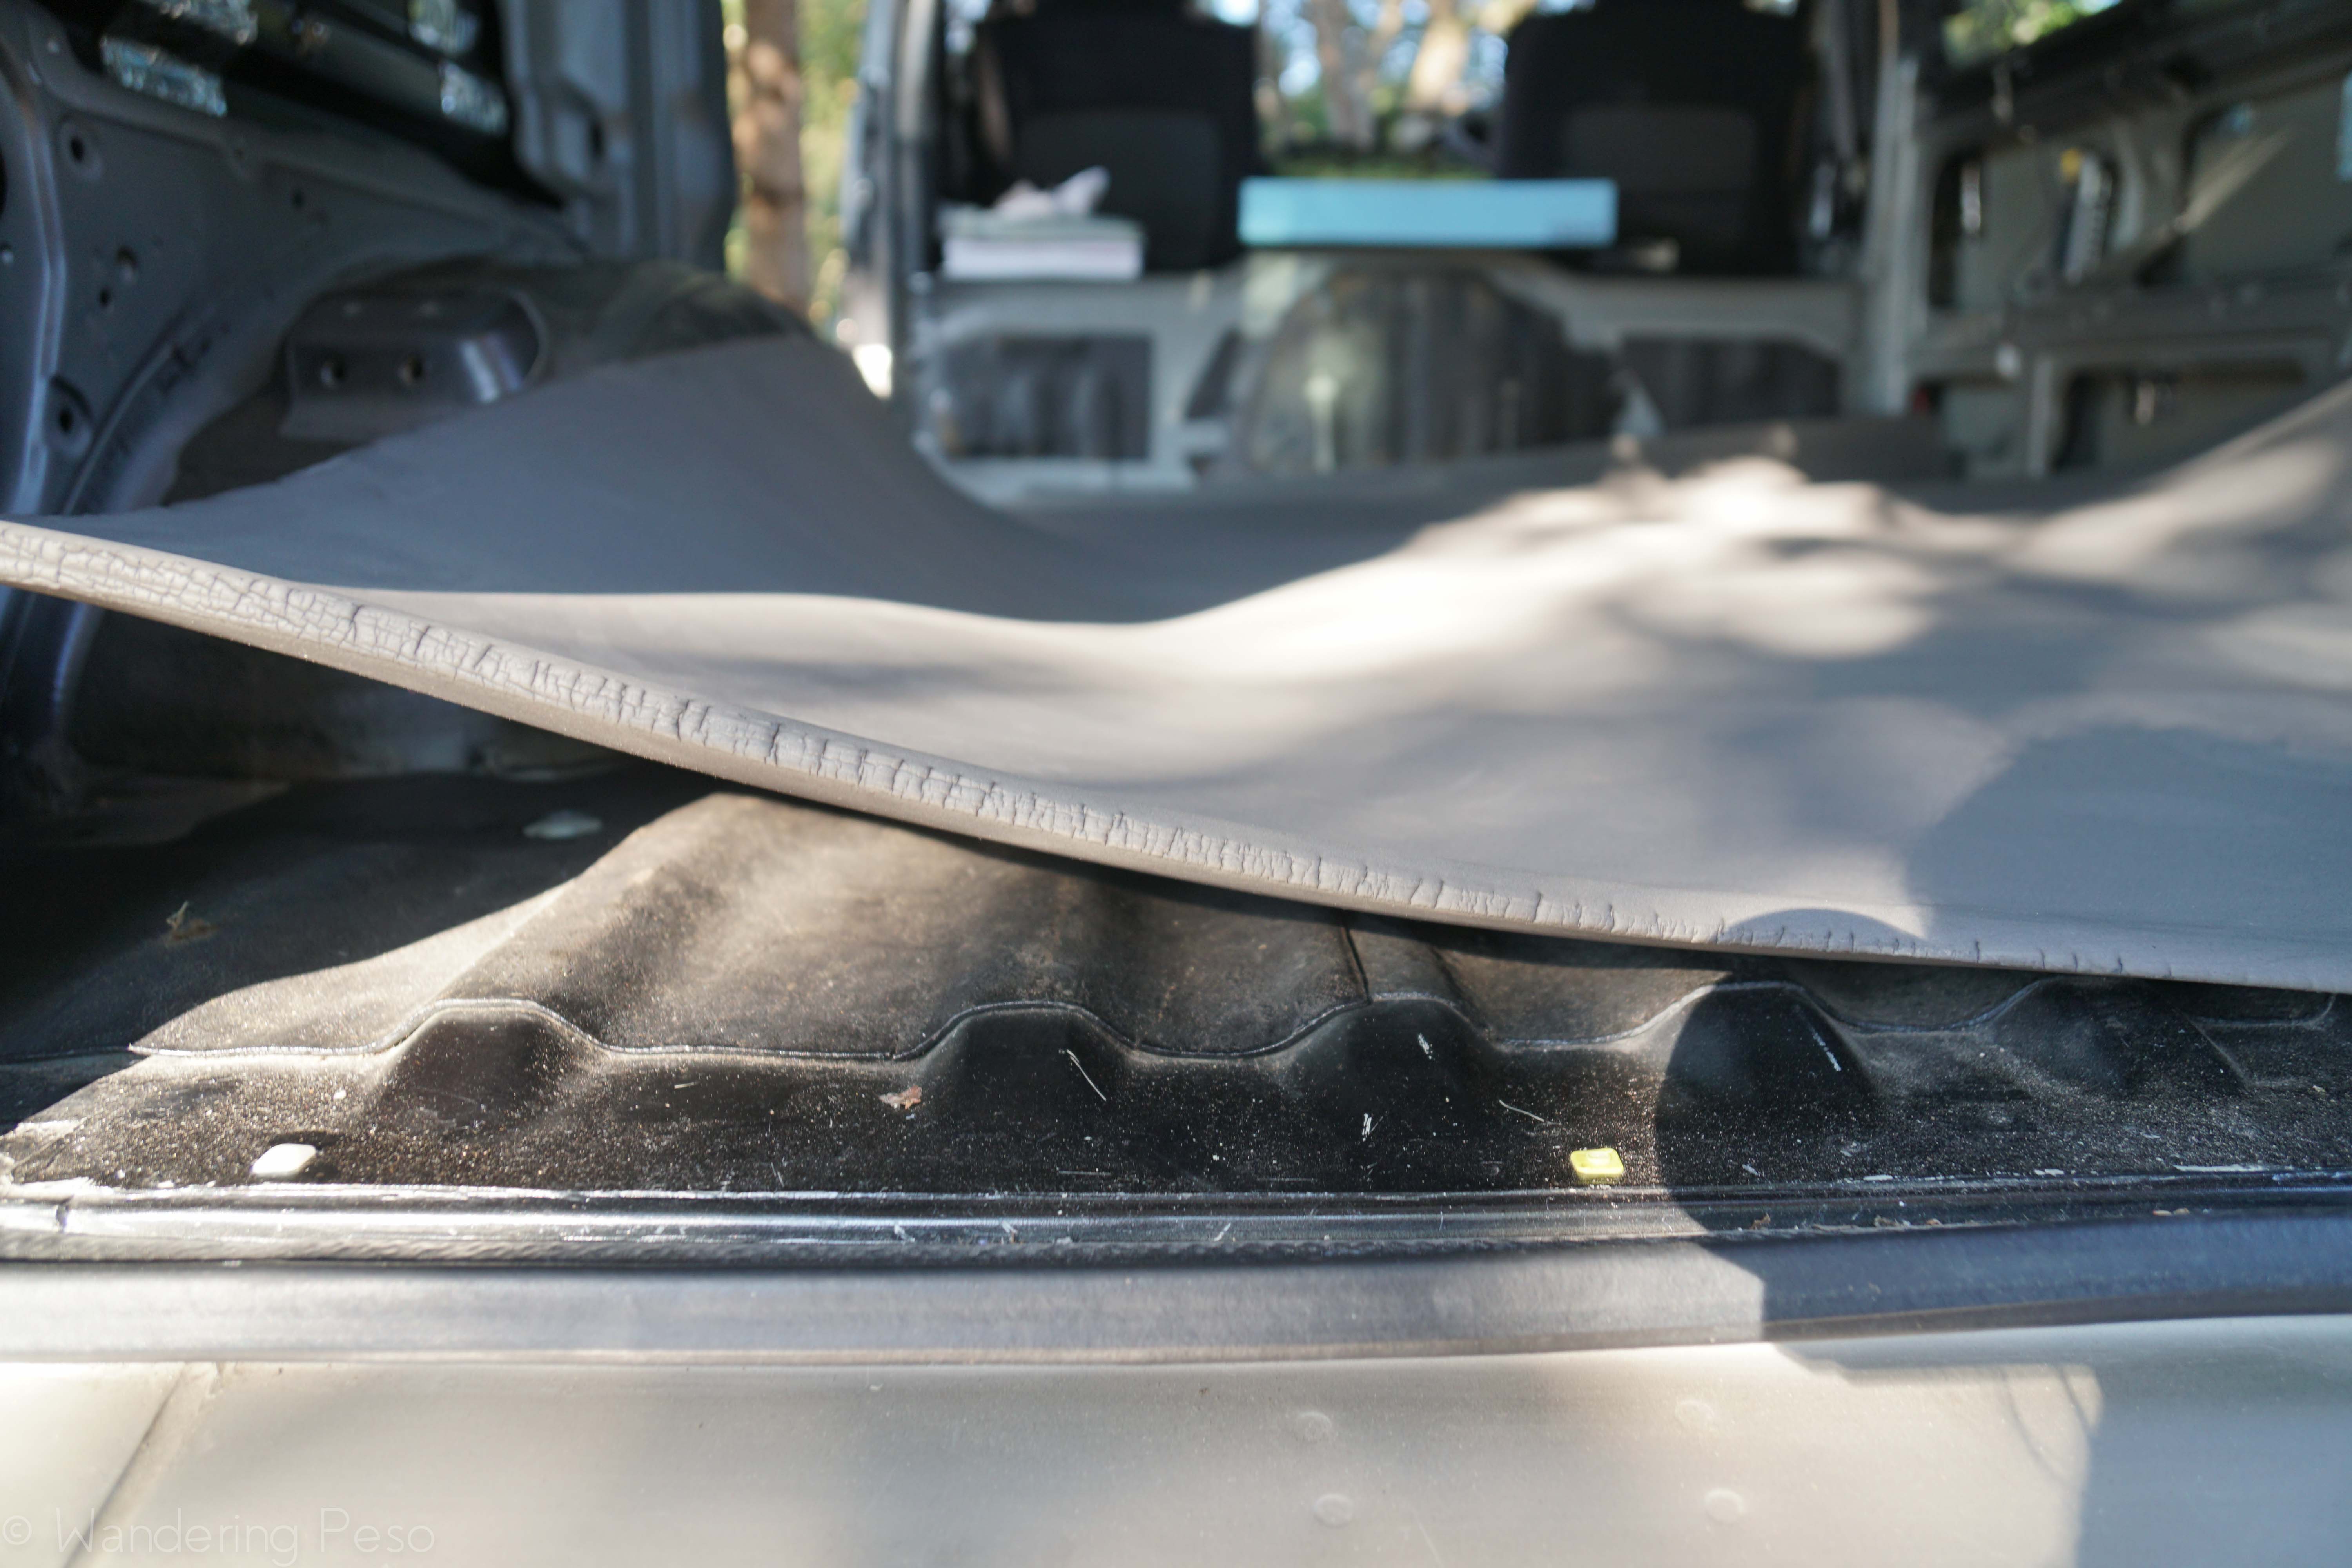
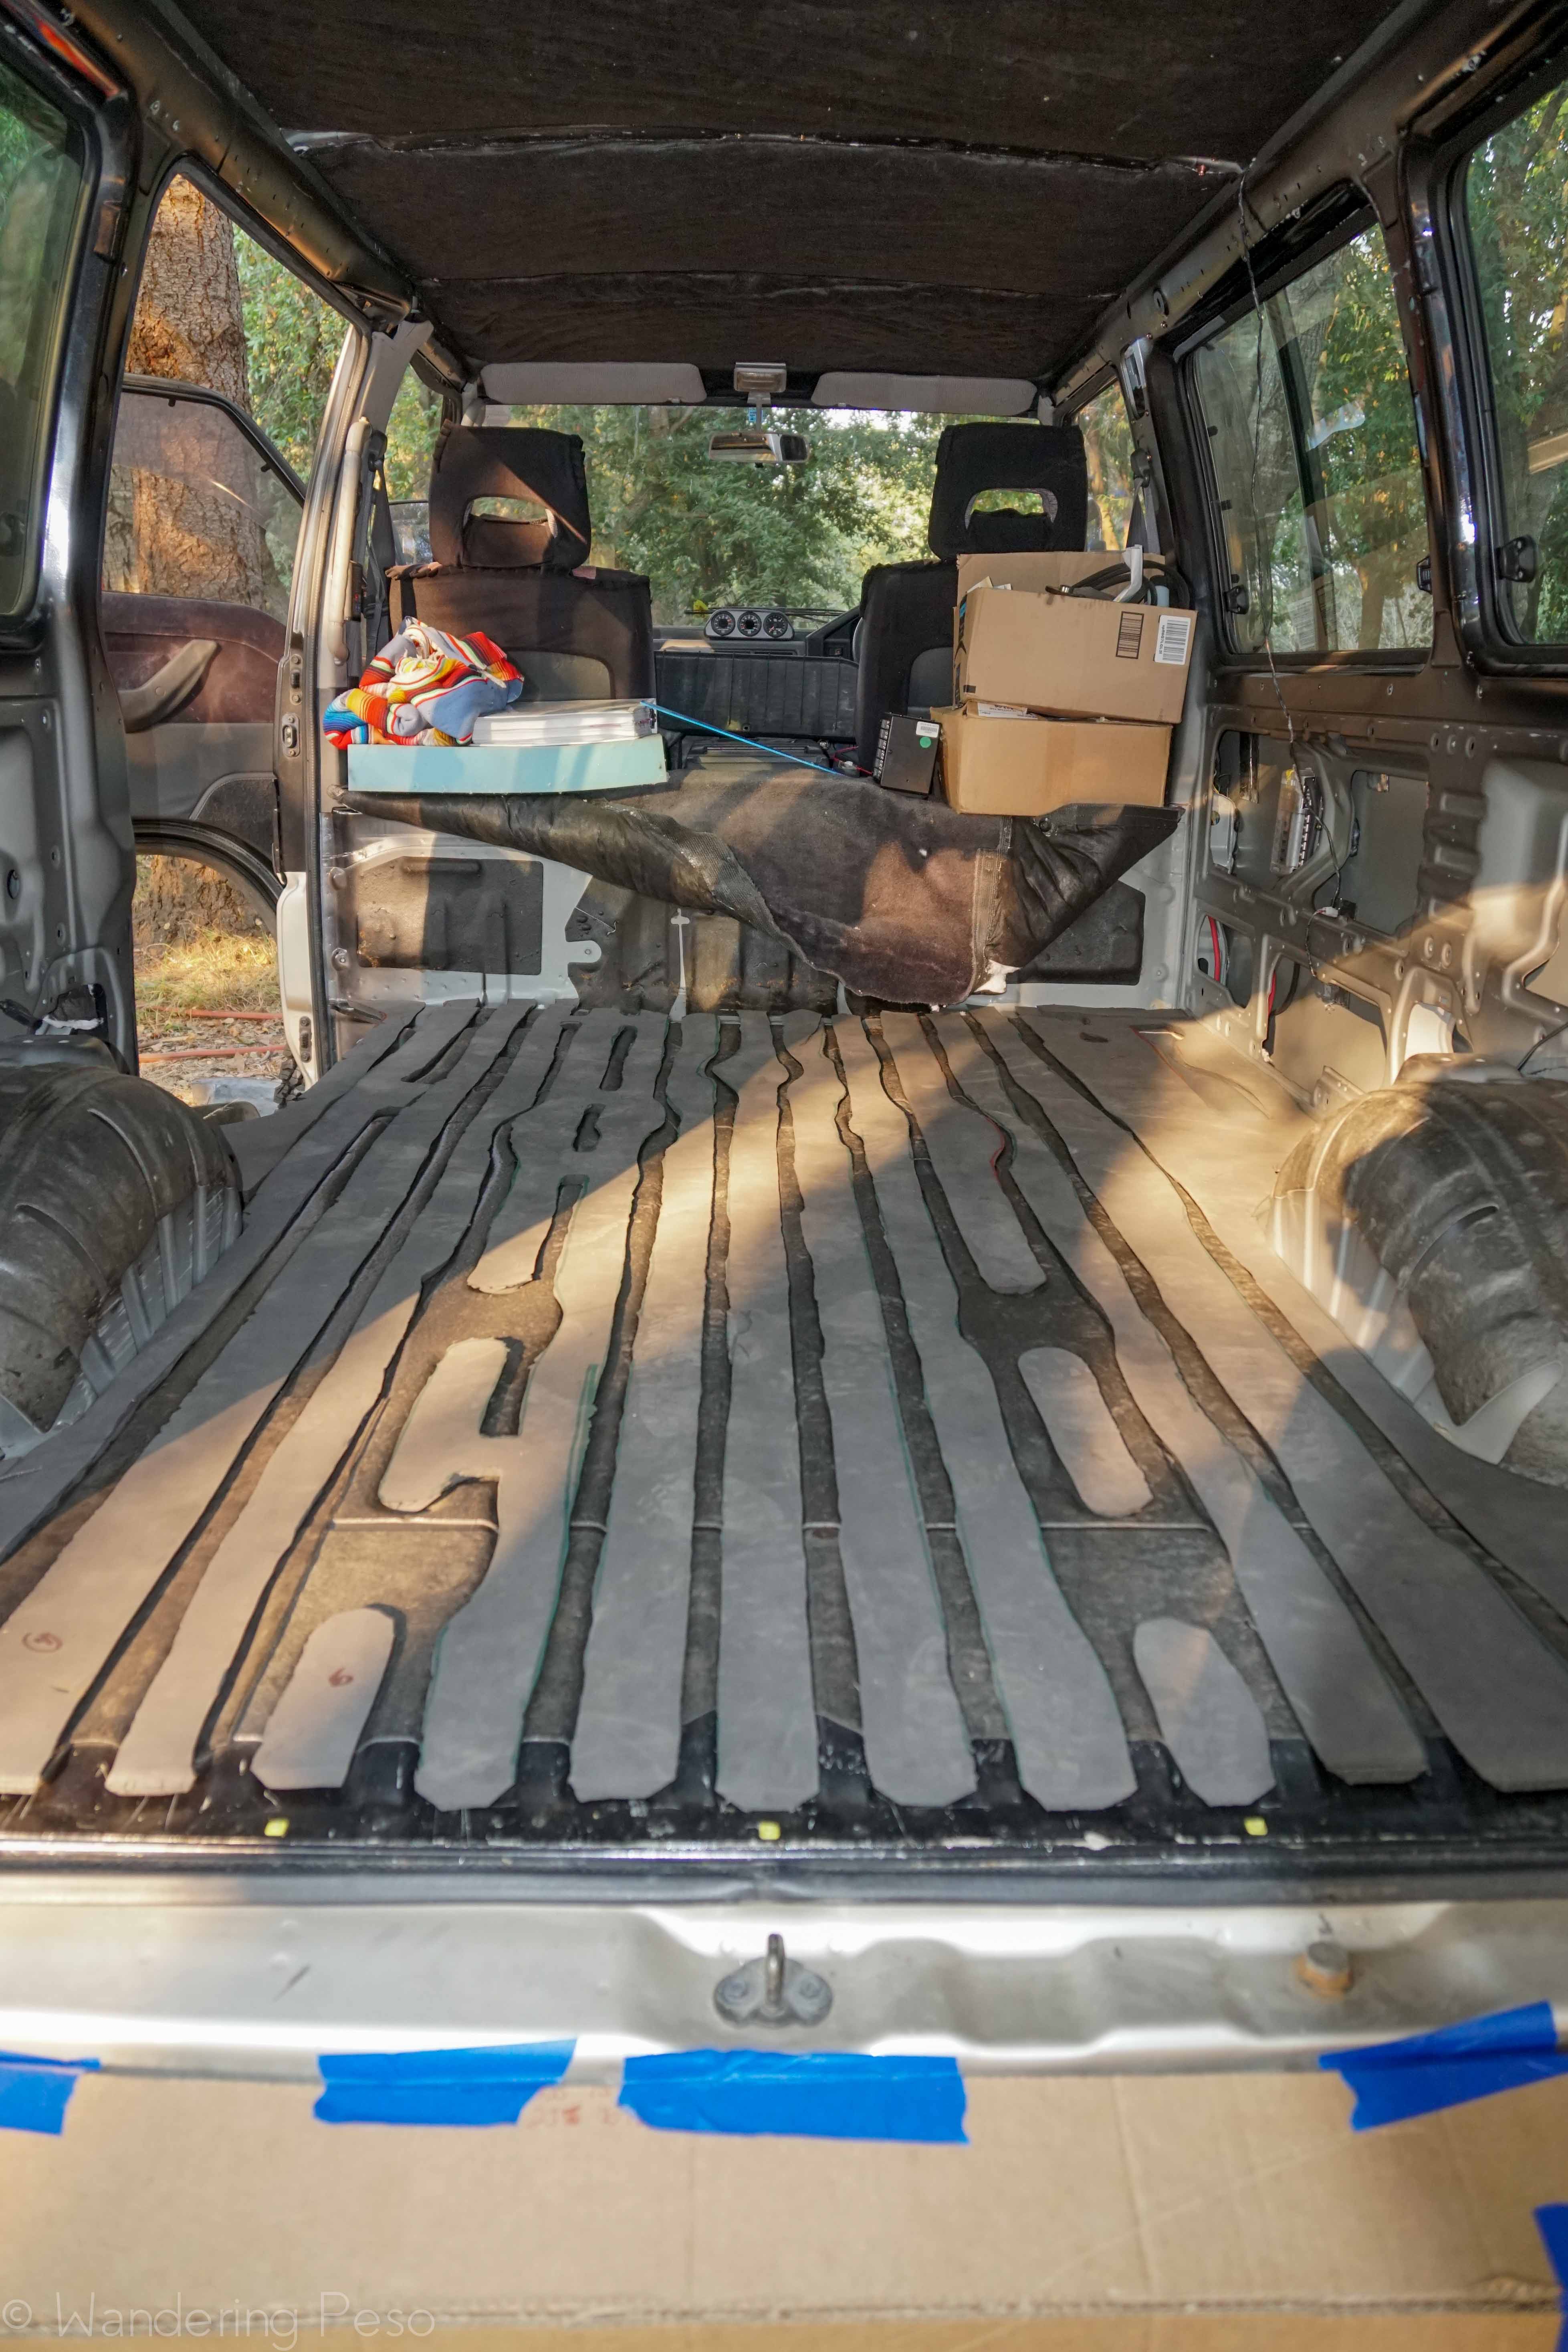
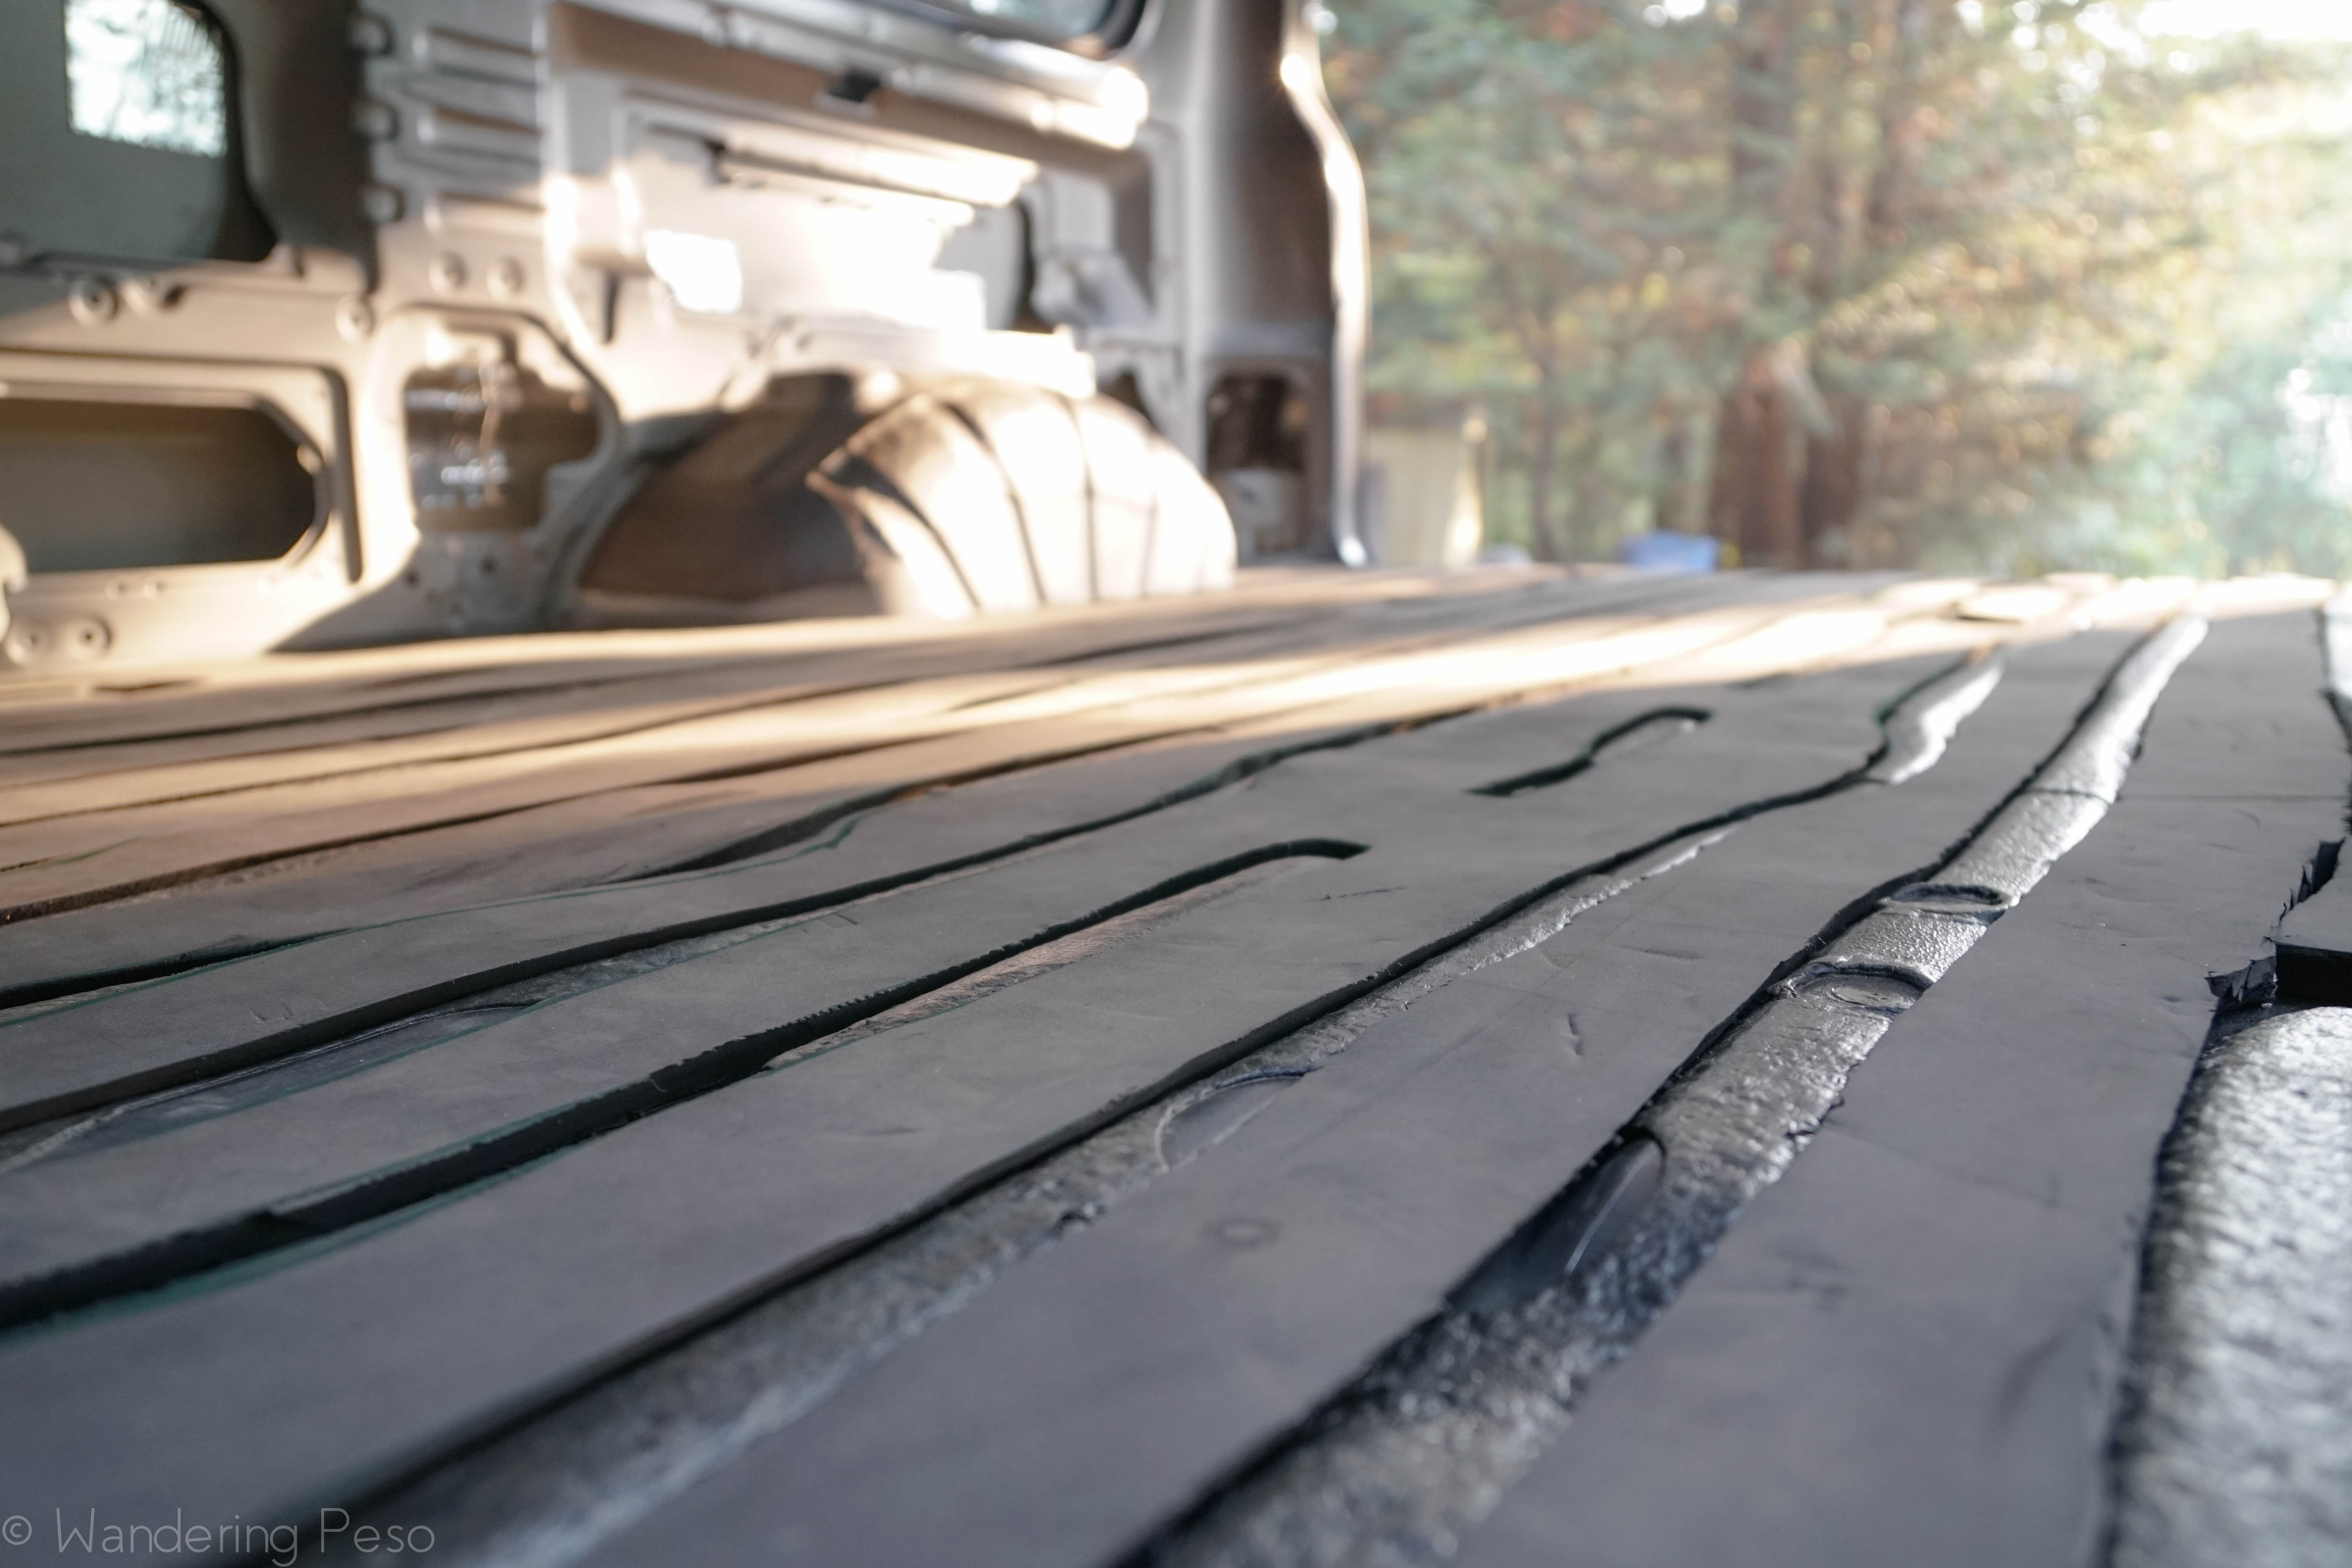
- Floor: Neoprene strips in between flooring ribs, 1 full sheet of 1/8″ Polyethylene 4lb density, 3/8″ baltic birch ply
Why we did it:
This modification in both research and installation has taken the longest so far. Mostly because of all the conflicting, variety and opinion based (not fact based) information that is available on the web. In the end, we listed our goals for insulation and analyzed the products available to see which one’s met those goals the best. Sound dampening and thermal regulation for both cold and hot conditions were the most important.
Sound Dampening:
For the sound dampening, we decided that 25% coverage with a butyl based sound dampener that had a 6 mil or thicker aluminum backing was the best for our sound goals. (There were a number of studies I found to back up my choice of 25% coverage being the most effective.) The aluminum thickness eliminated 95% of the sound dampeners available and we ultimately chose the Stinger product for its size versatility and price. It doesn’t have the thickest aluminum backing. It is only 6 mil, but the other brands with thicker aluminum only had 8 mil aluminum thickness. After installing the tiles on the ceiling, it was immediately noticeable the change in sound vibrations. Even the sliding door didn’t sound as loud when being shut. The process was fairly easy for installation.
You need:
- Sound dampener tiles
- Box cutter
- Straight edge
- Rubbing alcohol & rag
- Rolling pin or roller designed for this application process (I chose a rolling pin because my surface area was mostly flat and didn’t need the smaller one)
- Flat surface to cut the tiles to size. I calculated the area I needed and divided the sheets into 6 pieces and installed them equal distances apart.
In the engine compartment, we installed the Dynamat engine liner under the removable factory heat shield. Just follow the directions on the box. Easy to install.


Thermal Regulation:
After researching many different methods of thermal regulation for vehicles, we decided to use Thinsulate SM600 by 3M for its thermal regulatory properties and ease of installation. When deciding which product to use, it is really important to look at the testing data. If the data doesn’t make sense, it’s probably not real. 3M has developed this product for many years and it is currently being used by many car manufacturers. We spoke with the executive salesperson for this product at 3M and he was very thorough about explaining how its different from other insulation options. He provided test results and data charts to see how it works under different conditions.
We purchased 150 square feet of Thinsulate from Hein at Impact Graphics & Product Design, Inc. He is the only distributor for this product to the public. It is really easy to install. It takes time and proper measuring, but as far as the actual install, it really isn’t that bad.
You need:
- Thinsulate SM600
- Sharp scissors – I used kitchen shears and it worked just fine.
- 3M 90 Adhesive Spray
- Extra hands for installing
- Flat surface for measuring and cutting – We don’t have a workspace, so I used the back of the van. It definitely took a little longer doing that, but you have to do what you have do.
- Plastic or butcher paper to tape off windows for overspray of the adhesive
- String/Wire for feeding Thinsulate through narrow passages
It is helpful to pull 1/2″ or 1″ of insulation from the edges off the scrim to create a thin band of bare scrim that can be attached to the surface. It isn’t necessary, but definitely looks cleaner and more professional with the scrim edge. We don’t have a garage or any hard clean surface to work on so, using the back of the van was not ideal for cutting all the Thinsulate. However, that being said, it was still pretty easy to install. We posted a time lapse below of the ceiling installation to get an idea of what we did.


Comments
6 CommentsCody
Feb 2, 2018Thanks for sharing. About to embark on our own sound dampening quest in the van. Do you have any links to the studies and research you did regarding the best installation methods?
We opted for the 80mil butyl dampener. Hopefully works well for our needs.
Cheers!
Lucia Papineau
Feb 7, 2018I will look at my notes to see if I can find them before we leave on our journey! It’s been a little nutty closing up shop and getting the van ready. How are you using it?
Dean Lofquist
Feb 17, 2018Wondering why you didn’t choose to cover the wheel wells with the sound dampener? I would imagine that would be the greatest source of road noise.
Lucia Papineau
Feb 20, 2018Hi,
Good question! The Delica already had a factory installed sound dampener coating on the floor and the wheel wells. Since reading into how the sound dampening material works, we decided to not add the sound dampening material that is on the walls and ceiling to the wheel wells. That stuff is most effect for dampening vibrational noise and since the wheel well shape and thickness of metal doesn’t produce the same vibrational noise as the walls and ceiling it didn’t make much sense to add more of it to the existing covering. You’re absolutely right that the wheel wells do produce a bit of noise. To reduce that, we are going to add layers of the Thinsulate material into our cabinets that are permanently covering the wheel wells to help with excess road noise.
Logan
Mar 31, 2019Did you remove the rear AC/heat in the wall behind the driver’s seat? And if so, could you please explain the process?
In the middle of tearing down my Delica in preparation of a camper conversion, and I’m stumped on that point 😅
Thanks in advance!
Lucia Papineau
Apr 12, 2019Our AC system was not working when we imported it from Japan and we determined there a leak thus no gas in the system. The most important thing is to capture the gas before dismantling the system. You can reuse the gas (R12). We also purchased AC block off’s and installed them on the AC lines under/near the passenger seat. This way we could recharge our system and not have to worry about leaks. The coolant lines need a bypass because they run through that rear system as well. We used a 5/8” u-shaped coolant hose with clamps to keep us mobile until we could install the new diesel heater. You can permanently keep the u-shaped hose if you are not incorporating the coolant lines into a heating system. It’s pretty straight forward from there to remove the AC/heater unit.
Let us know if you have any more questions!